Snapshot
Type of Interaction: Asynchronous
Type of Course: Face-to-face, Hybrid, Online
Type of Activity: Medium to High Stakes
LMS Used: TRACS
Tools Used: Tablet
This post describes a solution for sharing processes, explanations, etc. that students may need to review repeatedly.
Description
Using whiteboard apps with a stylus and screen recording tools on tablets is an easy way to model processes, demonstrate concepts, solve equations, or present other content that is visual in nature. You can upload your video to Mediaflo and share the url (permalink) with students so they can review the content. Learn more about Mediaflo.
Students can also use whiteboard apps to demonstrate their thought processes while solving a problem. For example, let’s say Anik is having difficulty solving a statistical problem. You can have Anik attempt to solve the problem via the whiteboard application while thinking aloud as he solves the problem. You can then view the recording to analyze any missteps in attempting to reach a solution. Anik can upload his video to TRACS or ePortfolio, or otherwise share it for feedback.
Process
There are a variety of whiteboard apps available for iPad and Android devices. See the table below for some free or low-cost suggestions:
| iPad | Android devices |
|---|---|
| Whiteboard – Nothing more Nothing less | Interactive Whiteboard |
| Quick Sketch—Whiteboard Drawing | Whiteboard Pro |
| *Explain Everything | *Explain Everything |
* This app even has its own recording feature.
To begin:
- Start your device’s recording function (see the following section for help).
- Open your preferred whiteboard application.
- Demonstrate your concept including your narration. Students are more likely to view the full recording if you keep it short, for example 3-5 minutes.
- Stop your recording and preview. It is not uncommon to take several tries before you are satisfied with your recording.
- Trim any unnecessary opening or ending steps from your recording so that it includes only the demonstration. Upload your recording to Mediaflo and provide the Mediaflo link to your students. Learn more about Mediaflo.
Screen Recording on iOS and Android
Before you start, you will need to determine the best way for your tablet to screen record with audio if you are not using a whiteboard application with built-in recording features:
Mac iOS comes with a built-in screen recording feature. To access:
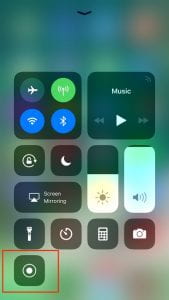
- Swipe up to enter the Control Center.
- Tap and hold the Screen Recording icon shown below to open the Screen Recording options window.
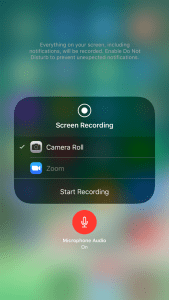
- Tap the Microphone icon to turn on the microphone (the icon will turn red). .
- Tap Start Recording and swipe to close the control panel.
- Record your demonstration.
- To stop the recording, tap the red bar at the top of your device or swipe up and use the Screen Recording window.
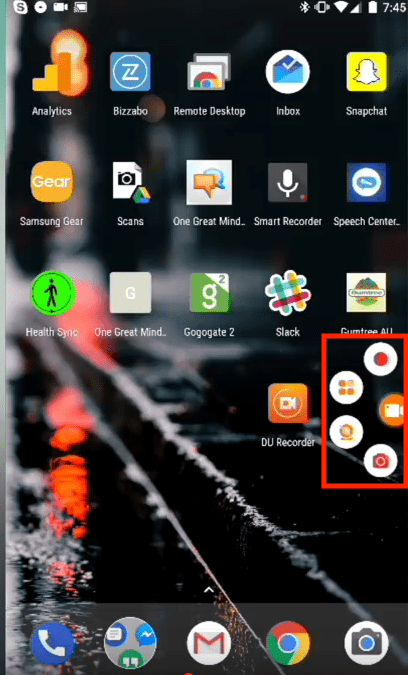
Android devices do not come with built-in screen recording, but you can find various screen recording applications in the app store. One such free application, D-U Recorder, has many features including easy access to recording and settings adjustments including the use of audio with video. The record button sits off to the side of your screen to be accessed at any time regardless of what other application you may be running. Click the floating camera button to see additional settings/features buttons. Learn more about how to use D-U Recorder.
I learned about Explain Everything this summer and never thought to use is for a student to share how they’re thinking. Great idea!